Heat Exchanger Cleaning – 10 Things to Consider
For friendly & knowledgable help contact us on:
01924 495 975 hello@sonicsolutionsltd.com Open Contact Form
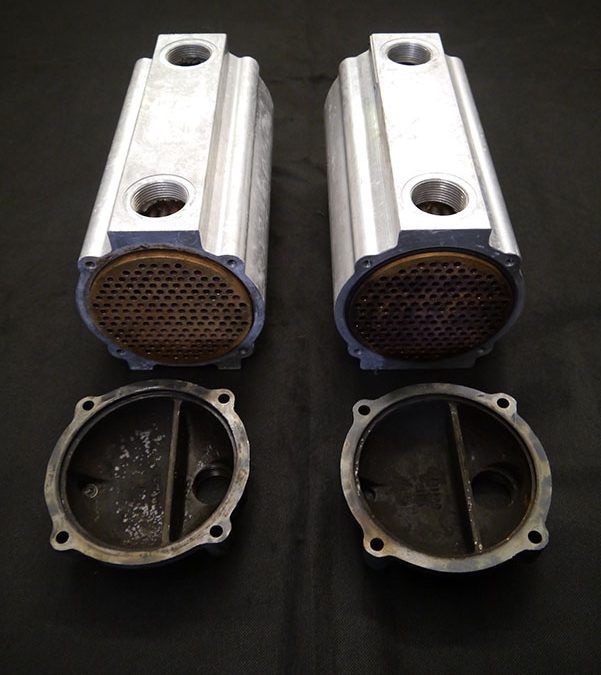
This article looks at the 10 key considerations we make when running a successful ultrasonic heat exchanger clean.
- What’s it used for?
Heat exchangers, intercoolers and radiators, whatever people like to call them, they kind of do the same thing. They come in all different shapes and sizes and are used totally different across the spectrum of industries. The reason we always try and find out what its used for is that it can better prepare us for the type of contaminant we might be facing. i.e a marine heat exchanger can be not only covered in general dirt and grease but also salt and scale. - Identify all possible contaminants
Just knowing what it’s used for isn’t enough to complete the picture, we need to know every possible type of contaminant we could be facing. Many times we have been told the only contaminant is grease and dirt, only to find out there is burnt on carbon inside causing serious blockages. Fail to prepare, prepare to fail. - Blockages or extreme build-up?
When heat exchangers arrive the first thing we do is check for severe problems, as a simple job can turn into a long hands-on labour intensive day. We usually see these types of thing in hard water areas, for instance, a coffee brewery in Bristol thought they just needed a simple de-scaling job but we found out later that the entire internals were blocked with a solid block of calcium deposits. 3 days later with hammer and chisels and some strong chemicals, we got the result, but usually this would have been around half a day at best. - What is it made from?
We have to know what the item is made of as it directly affects the types of chemicals we use and also how long we can leave it in certain ultrasonic baths for. For example, the soft easily bent aluminium fins on many radiators and intercoolers must be treated with extreme care both physically and chemically or risk irreversible damage. - Choosing the right chemistry
As mentioned some chemicals can harm certain metals, therefore we have to be sure that the cleaning solution will not only clean it but not damage it. This is where many, many years of experience in the ultrasonic cleaning business helps. 99 times out of 100 we know exactly what chemical will attack the contaminant whilst leaving the items completely unharmed. - Time
Almost every type of heat exchanger has copper internal pipework for the transfer of water or oil, they also commonly have brass ends holding all the pipes in place. This is important to know because copper in heat and caustic chemical solution likes to leave the pipe and plate itself over the brass. The time is important because the quicker you can have the contaminant cleaned the less likely there is to be a transfer of copper to brass. - Monitor and rinse
Because elements of a heat exchanger are very prone to damage you must carefully monitor it whilst in the ultrasonic bath. Always checking for “fizzing” this occurs when aluminium reacts with an uninhibited alkaline caustic solution, so if you see little white bubbles rising up out of the parts then immediately take it out and rinse off as it is literally being dissolved into the solution. The other thing you must take care of is the way it lays in the tank. You must suspend it or have none of the fins touching any steel baskets or the tank base, irreversible damage will be done if not properly placed in the ultrasonic cleaning bath. - Rinse and repeat
We like to take the parts out of the tank periodically to give them a complete spray down and rinse so we can check to see if it’s necessary to stay in the ultrasonic bath. If we are not satisfied then it will go back in for further cleaning - Drying
We have a number of different methods when it comes to drying. A system we have found most effective is using high powered compressed air to blow between all the aluminium fins and down inside the copper pipework, this is brilliant at not only drying but also for removing any little tiny particulate matter that was left behind from the cleaning process. After the compressed air dry if we feel it needs further drying we put it in the drying cabinet for up to 1 hour until we are completely satisfied it’s water-free. - Packaging
This is one of the most important factors because all the hard work done to achieve the brilliant cleaning result could all be undone with poor packaging. Protect the fins, strap it down and cover it with layers of progressively stronger material starting with foam or bubble wrap then carboard and preferably a lid on a crate of some sort, ensuring all void space is filled.
To book a Free Trial Clean or discuss your heat exchanger cleaning requirements with one of our expert staff. Call us today on 01924 495 975 or email hello@sonicsolutionsltd.com

